Microsoft PowerPoint: animation and slideshow formats
| Create a step-by-step animation | |
| Save a read-only slideshow (.ppsm) |
Create a step-by-step animation
Suppose you want to highlight areas of a picture and show a comment for each area, one at a time. Start with a blank PowerPoint presentation.
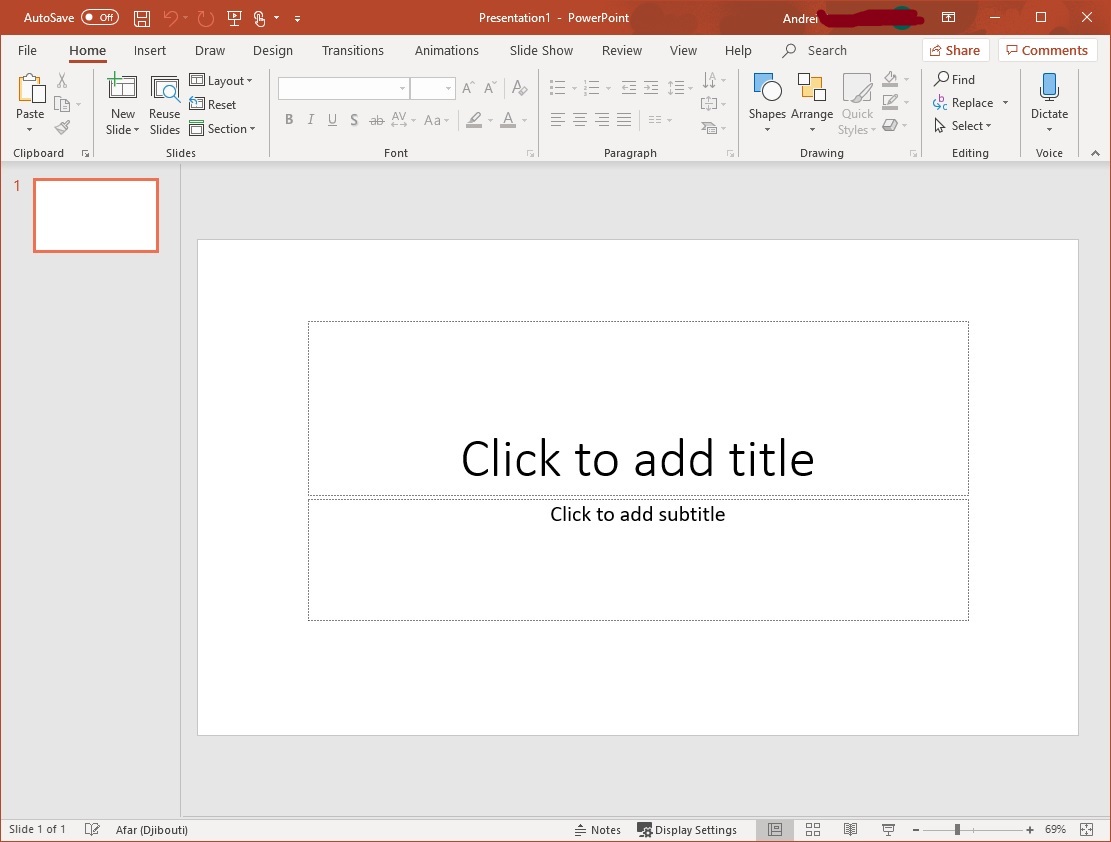
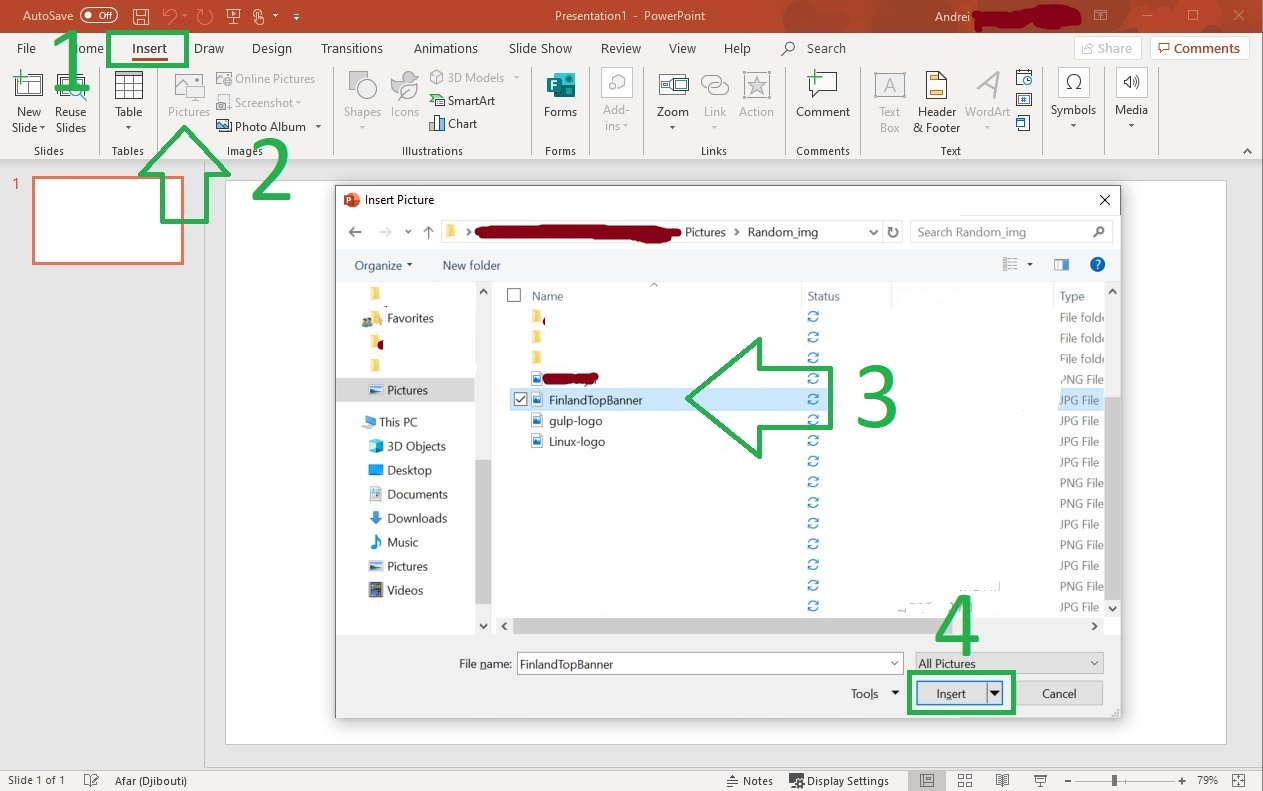
Insert the picture you want to annotate. This example uses a logo.
Choose Insert → Pictures and select the image.
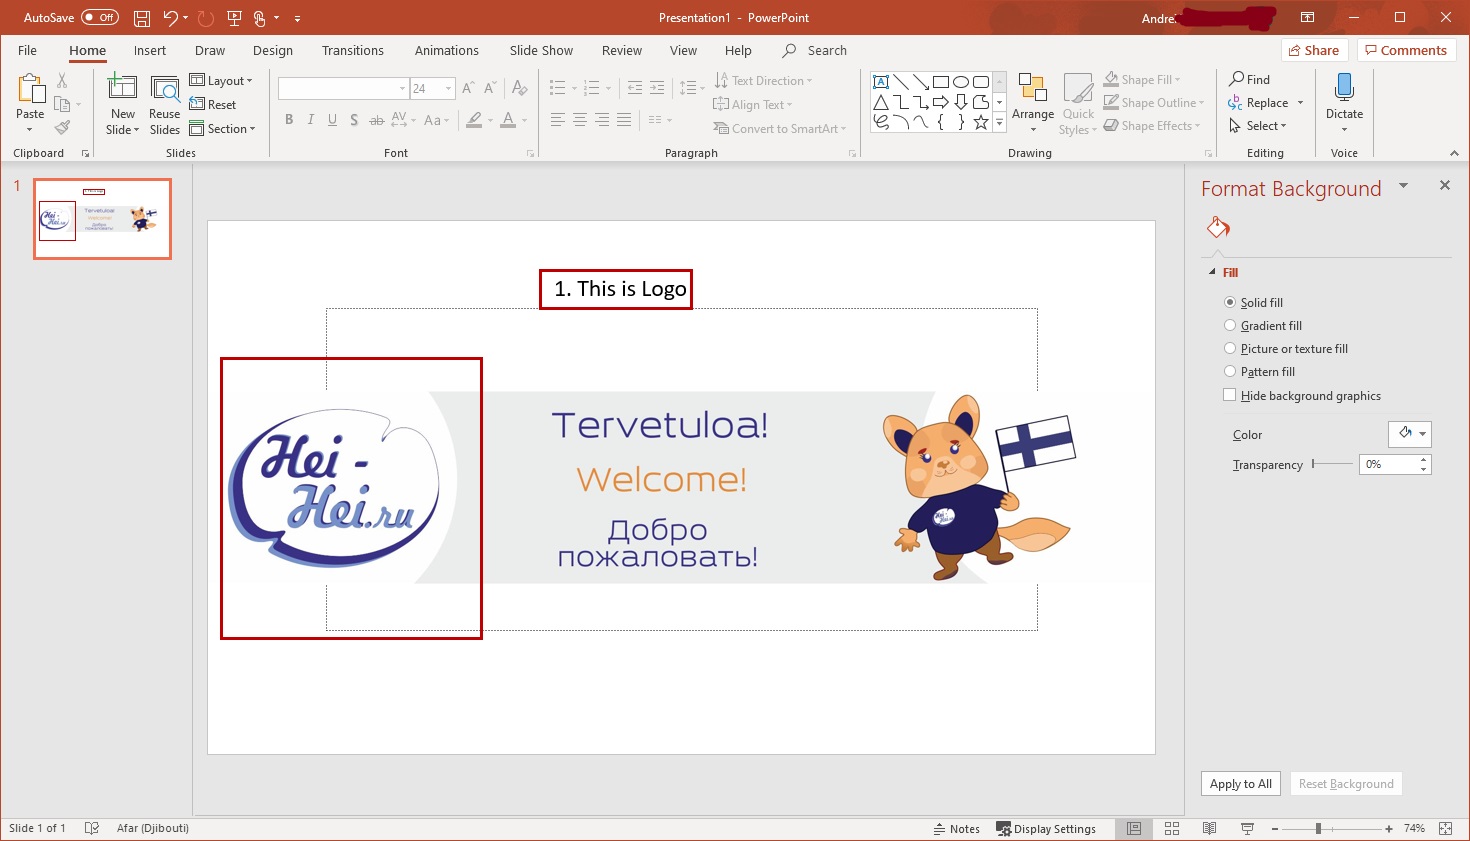
Add a text box with a comment, then draw a shape around the area you want to highlight.
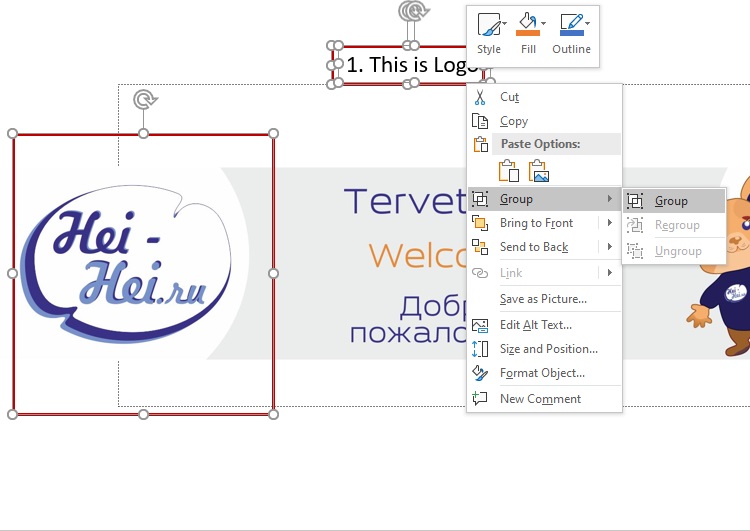
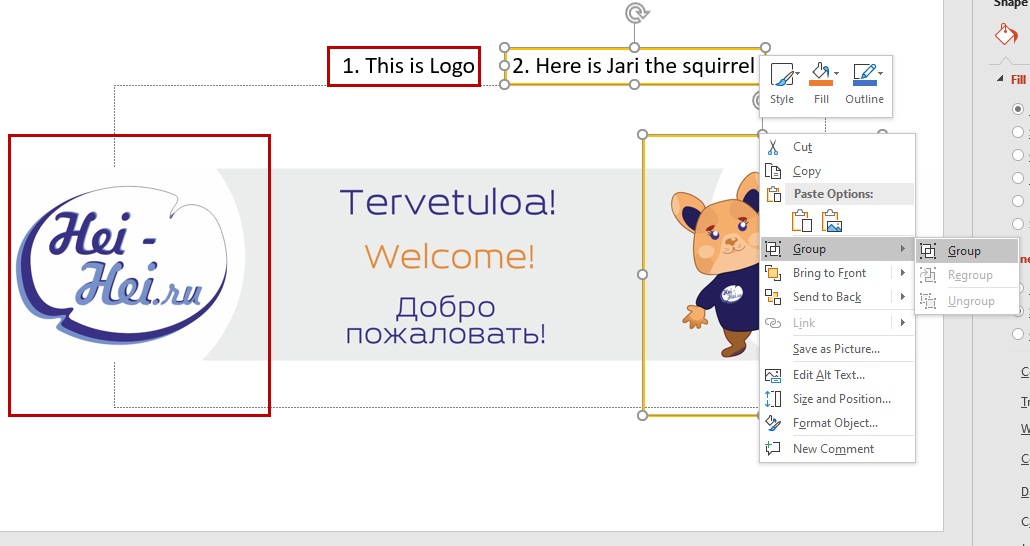
Select the text box and the highlight shape, then group them.
With the group selected, open Animations and choose Appear.
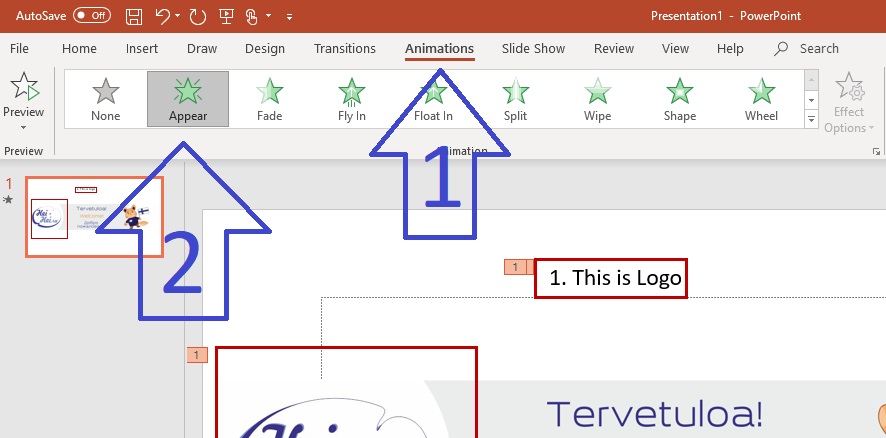
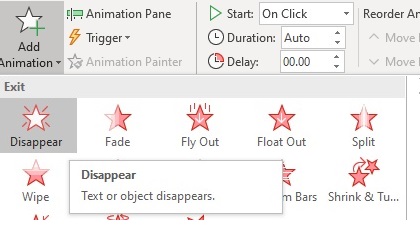
Add a second animation to the group: Add Animation → Disappear.
Create and group the next annotation.
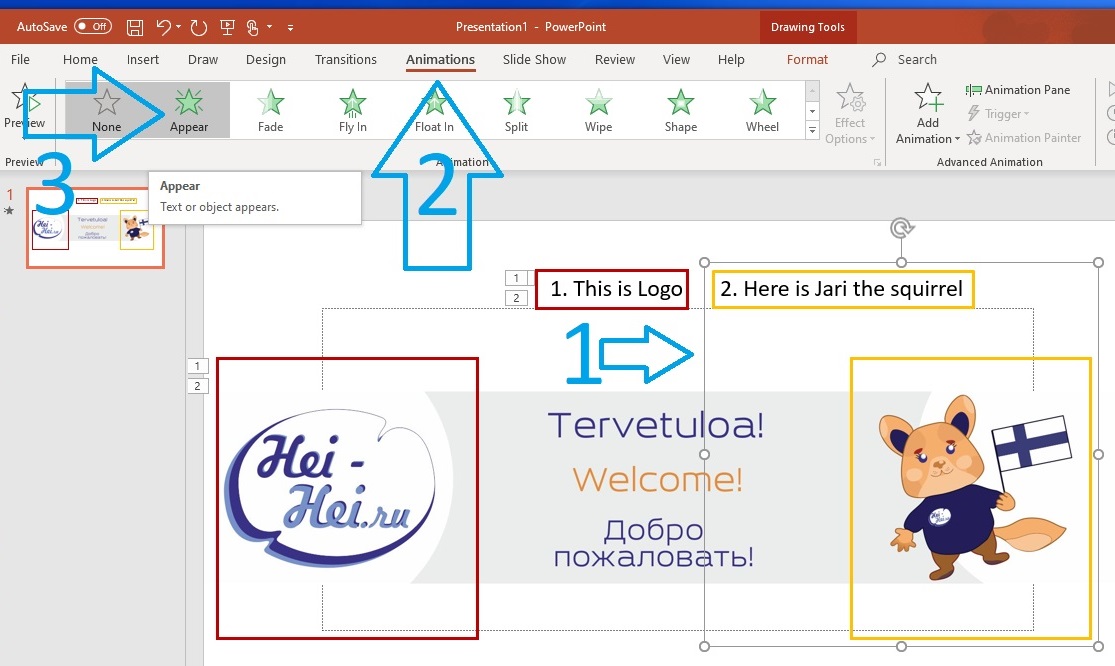
Repeat the same steps for the second group:
Animations → Appear, then Add Animation → Disappear.
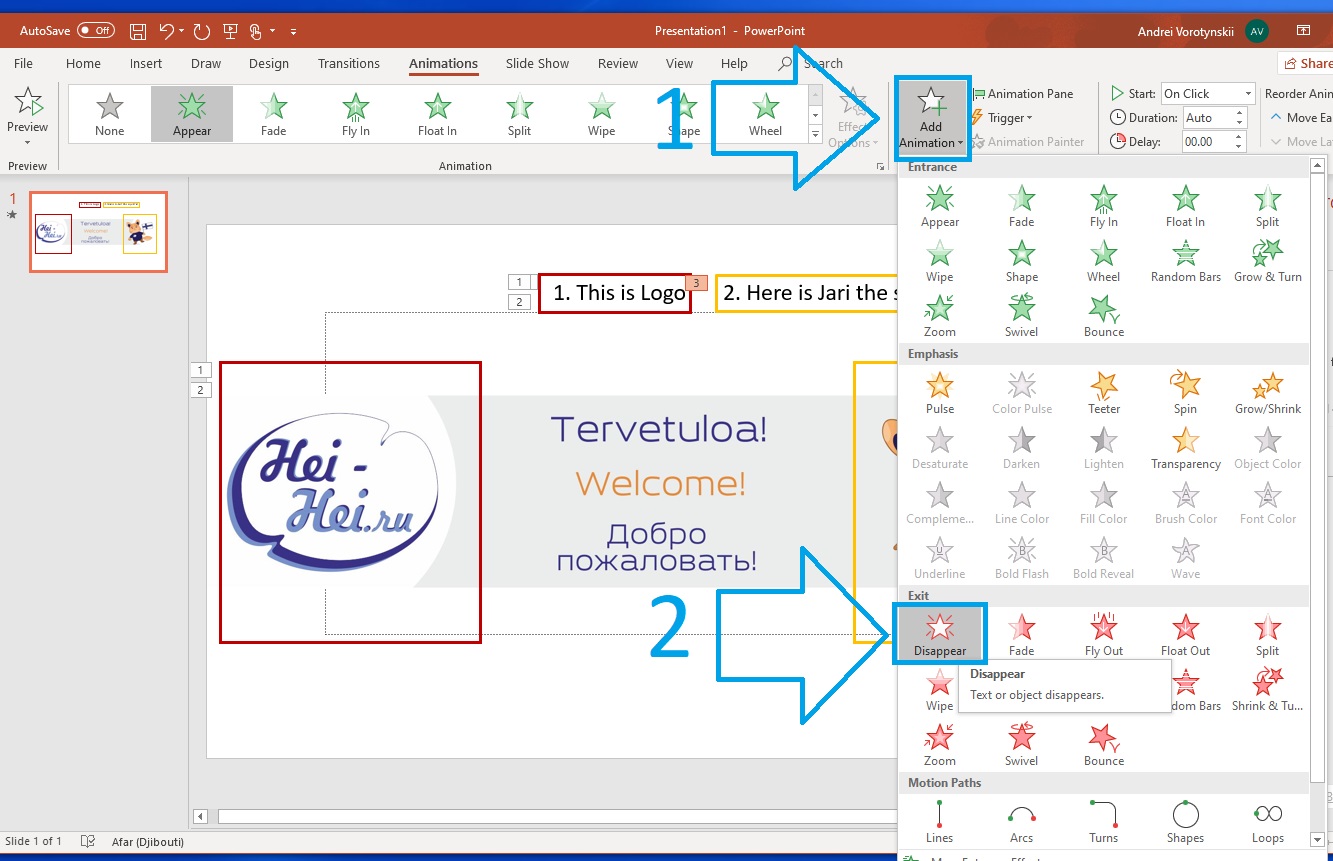
Use the Animation Pane to review and reorder effects. Entrance effects are usually shown in green; exit effects are shown in red.

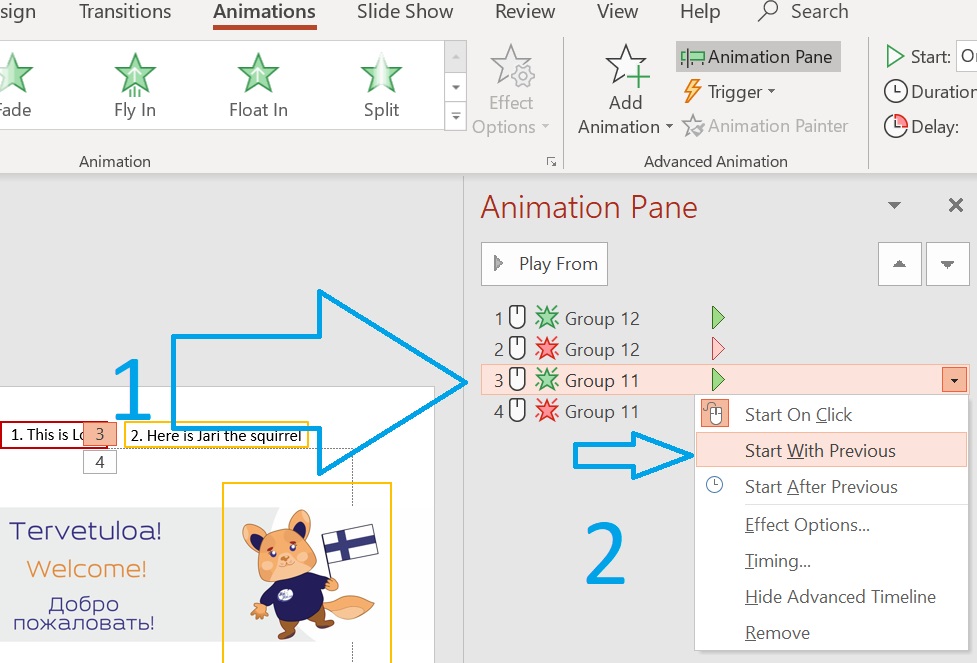
To make the second group appear immediately after the first disappears, select its Appear effect in the Animation Pane, open its context menu, and choose Start With Previous.

Save a read-only slideshow (.ppsm)
To share a presentation without giving viewers the editable source, save it as a PowerPoint Macro-Enabled Show (.ppsm) instead of a .pptx file. It opens as a presentation rather than an editable deck. This hides the normal editing interface; it is not encryption or access control for confidential content.

Article author: Arthur Isaev
| Microsoft Office | |
| Microsoft Excel | |
| Microsoft Word | |
| Microsoft PowerPoint |