Jenkins basics
Introduction
Jenkins is an open-source software system written in
Java
, designed to support the continuous integration process
of software.
It was forked in 2008 from the Hudson project owned by Oracle, by its main author, Kohsuke Kawaguchi.
It is distributed under the MIT license.
It automates part of the software development process that does not require human involvement, providing
continuous integration functions.
It runs in a servlet container, for example Apache Tomcat.
It supports version control system tools, including AccuRev, CVS,
Subversion
,
Git
, Mercurial, Perforce, Clearcase and RTC.
It can build projects using Apache Ant and
Apache Maven
, as well as run arbitrary shell scripts and batch files
Windows
.
A build can be started in various ways, for example by a commit event in the version control system, on a schedule,
by a request to a specific URL, or after another build in the queue finishes.
Jenkins capabilities can be extended with plugins.
Access control is implemented in two ways: user authentication and authorization.
Protection against external threats is supported, including
CSRF attacks
and malicious builds.
In 2011 Jenkins received an InfoWorld award as the best open-source project.
By default it listens on TCP port 8080
Jenkins Docker Agent
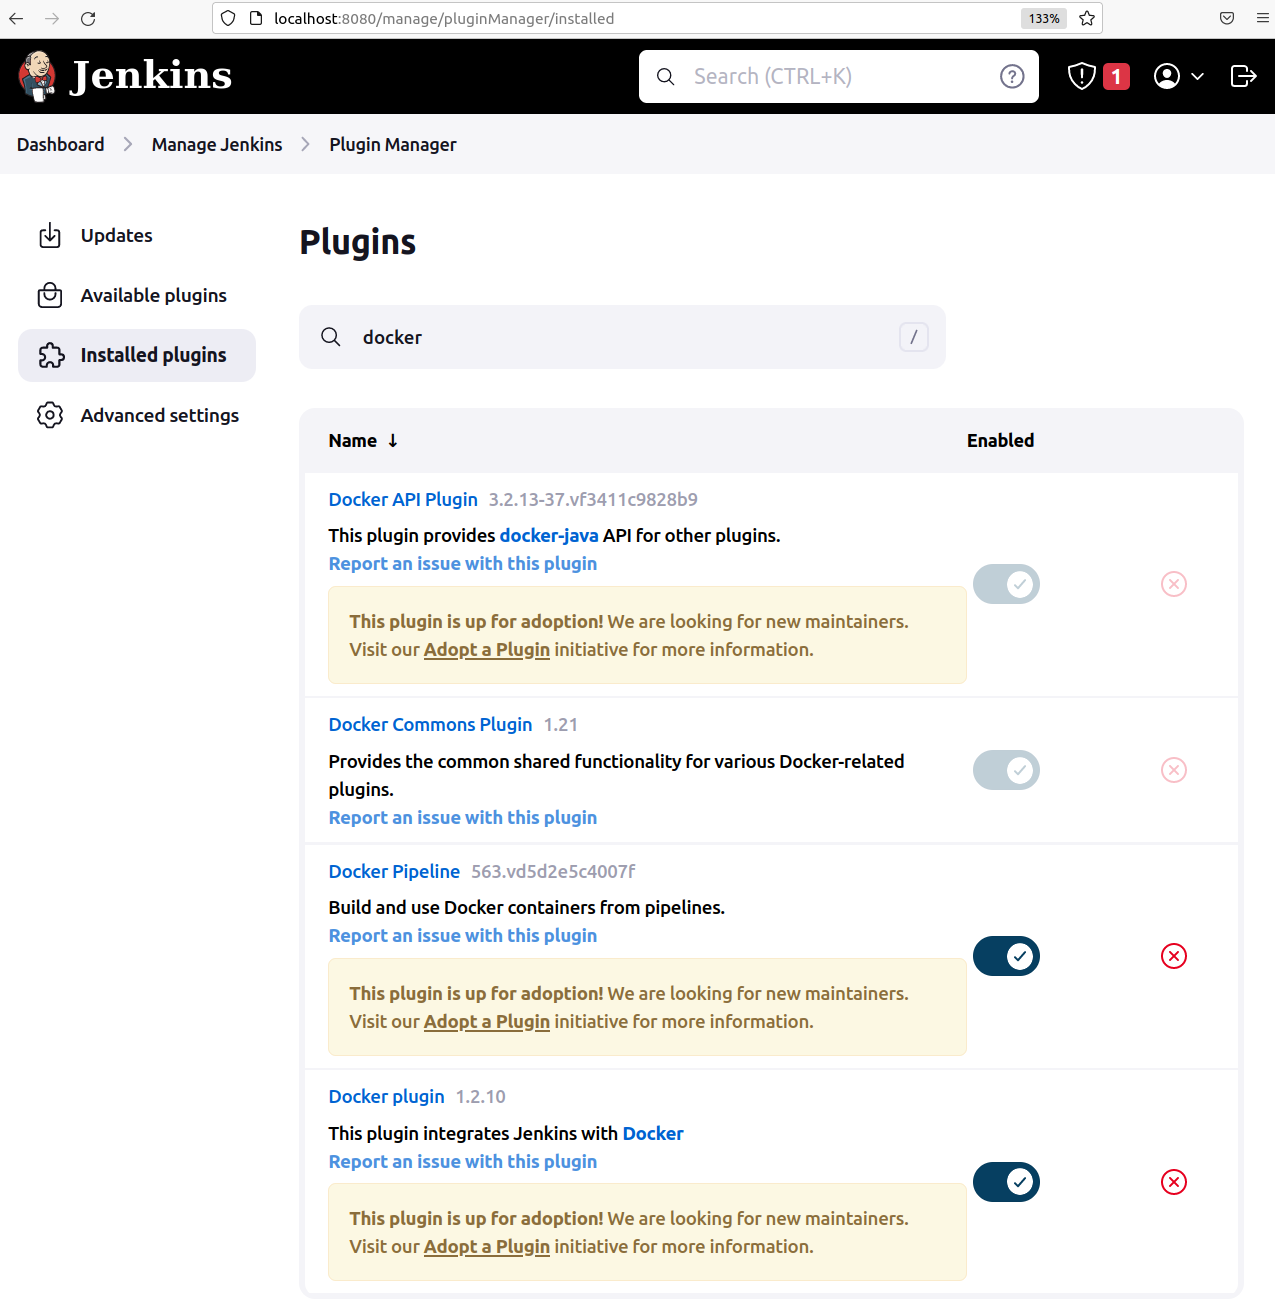
A relatively new way to create agents is to run them in Docker containers. To do this, you need to add the Docker plugin in Jenkins
Plugin Manager → Cloud Providers → Docker
www.aredel.com
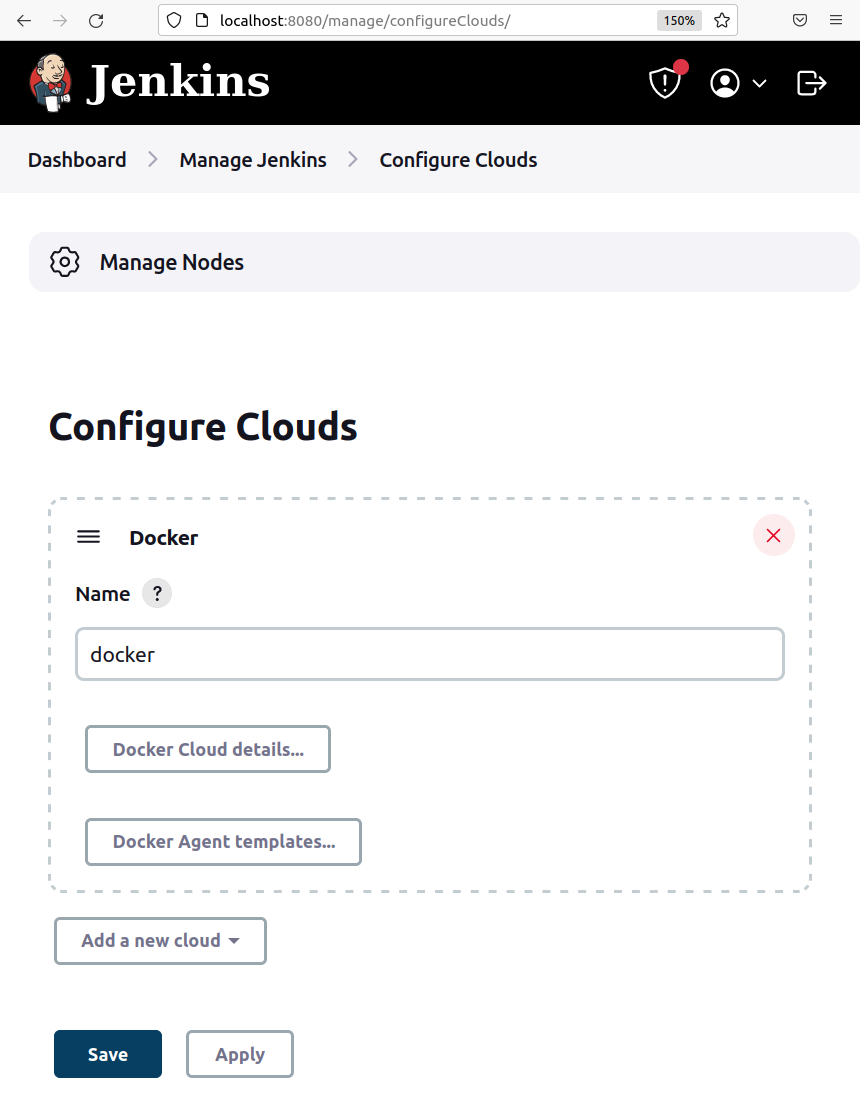
Configuration is done through
Manage Jenkins → Manage nodes and clouds → Configure Clouds
www.aredel.com
Let's set up a Docker server on a separate Ubuntu host on the local network and then return to configuring Jenkins
IP address
of my
Ubuntu
host 10.15.253.223
First of all, you need to
install Docker
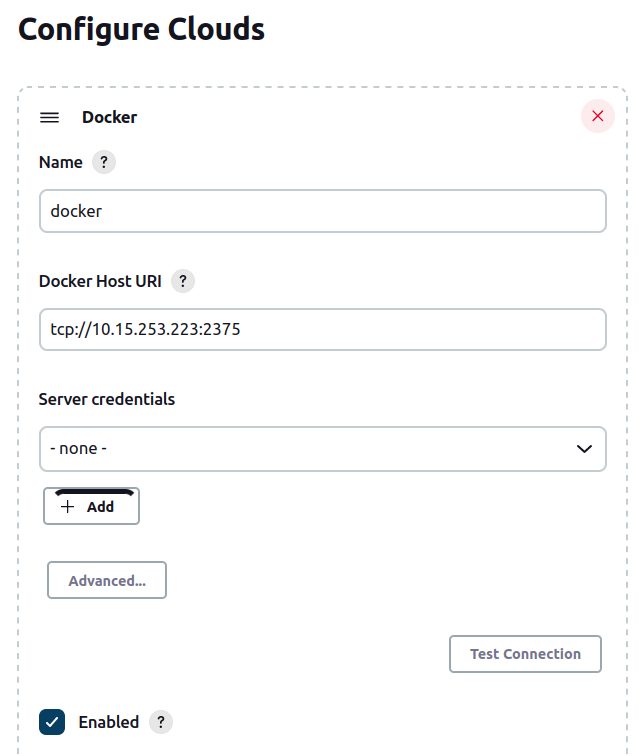
Then on the Docker server you need to allow connections to the Docker API.
To do this, you need to open port 2375
You also need to open ports from 32768 to 60999, which will be used for agents
(
instructions for Ubuntu
)
sudo vi /lib/systemd/system/docker.service
# ExecStart=/usr/bin/dockerd -H fd:// --containerd=/run/containerd/containerd.sock ExecStart=/usr/bin/dockerd -H tcp://0.0.0.0:2375 -H unix:///var/run/docker.sock
sudo vi /lib/systemd/system/docker.service
sudo service docker status -l
● docker.service - Docker Application Container Engine Loaded: loaded (/lib/systemd/system/docker.service; enabled; vendor preset: enabled) Active: active (running) since Mon 2023-01-09 12:00:07 EET; 3min 47s ago TriggeredBy: ● docker.socket Docs: https://docs.docker.com Main PID: 7709 (dockerd) Tasks: 10 Memory: 29.9M CPU: 862ms CGroup: /system.slice/docker.service └─7709 /usr/bin/dockerd -H tcp://0.0.0.0:2375 -H unix:///var/run/docker.sock Nov 17 09:24:04 andrei-virtual-machine dockerd[7709]: time="2023-01-09T12:00:05.488100986+02:00" level=info msg="ClientConn switching balancer to \"pick_first\"" module=grpc Nov 17 09:24:04 andrei-virtual-machine dockerd[7709]: time="2023-01-09T12:00:05.850772393+02:00" level=info msg="[graphdriver] using prior storage driver: overlay2" Nov 17 09:24:04 andrei-virtual-machine dockerd[7709]: time="2023-01-09T12:00:05.934673941+02:00" level=info msg="Loading containers: start." Nov 17 09:24:04 andrei-virtual-machine dockerd[7709]: time="2023-01-09T12:00:06.450509708+02:00" level=info msg="Default bridge (docker0) is assigned with an IP address 172.17.0.0/16. Daemon option --bip can be used to set a preferred IP address" Nov 17 09:24:04 andrei-virtual-machine dockerd[7709]: time="2023-01-09T12:00:06.689935636+02:00" level=info msg="Loading containers: done." Nov 17 09:24:04 andrei-virtual-machine dockerd[7709]: time="2023-01-09T12:00:06.990191356+02:00" level=info msg="Docker daemon" commit=20.10.12-0ubuntu4 graphdriver(s)=overlay2 version=20.10.12 Nov 17 09:24:04 andrei-virtual-machine dockerd[7709]: time="2023-01-09T12:00:06.990408478+02:00" level=info msg="Daemon has completed initialization" Nov 17 09:24:04 andrei-virtual-machine systemd[1]: Started Docker Application Container Engine. Nov 17 09:24:04 andrei-virtual-machine dockerd[7709]: time="2023-01-09T12:00:07.109669043+02:00" level=info msg="API listen on [::]:2375" Nov 17 09:24:04 andrei-virtual-machine dockerd[7709]: time="2023-01-09T12:00:07.122519364+02:00" level=info msg="API listen on /var/run/docker.sock"
Let's check whether the Docker API is available using curl
curl http://localhost:2375/version
{"Platform":{"Name":""},"Components":[{"Name":"Engine","Version":"20.10.12","Details":{"ApiVersion":"1.41","Arch":"amd64","BuildTime":"2022-03-07T15:57:50.000000000+00:00","Experimental":"false","GitCommit":"20.10.12-0ubuntu4","GoVersion":"go1.17.3","KernelVersion":"5.15.0-57-generic","MinAPIVersion":"1.12","Os":"linux"}},{"Name":"containerd","Version":"1.5.9-0ubuntu3.1","Details":{"GitCommit":""}},{"Name":"runc","Version":"1.1.0-0ubuntu1.1","Details":{"GitCommit":""}},{"Name":"docker-init","Version":"0.19.0","Details":{"GitCommit":""}}],"Version":"20.10.12","ApiVersion":"1.41","MinAPIVersion":"1.12","GitCommit":"20.10.12-0ubuntu4","GoVersion":"go1.17.3","Os":"linux","Arch":"amd64","KernelVersion":"5.15.0-57-generic","BuildTime":"2022-03-07T15:57:50.000000000+00:00"}
Let's check availability from the network
curl http://10.15.253.223:2375/version
{"Platform":{"Name":""},"Components":[{"Name":"Engine","Version":"20.10.12","Details":{"ApiVersion":"1.41","Arch":"amd64","BuildTime":"2022-03-07T15:57:50.000000000+00:00","Experimental":"false","GitCommit":"20.10.12-0ubuntu4","GoVersion":"go1.17.3","KernelVersion":"5.15.0-57-generic","MinAPIVersion":"1.12","Os":"linux"}},{"Name":"containerd","Version":"1.5.9-0ubuntu3.1","Details":{"GitCommit":""}},{"Name":"runc","Version":"1.1.0-0ubuntu1.1","Details":{"GitCommit":""}},{"Name":"docker-init","Version":"0.19.0","Details":{"GitCommit":""}}],"Version":"20.10.12","ApiVersion":"1.41","MinAPIVersion":"1.12","GitCommit":"20.10.12-0ubuntu4","GoVersion":"go1.17.3","Os":"linux","Arch":"amd64","KernelVersion":"5.15.0-57-generic","BuildTime":"2022-03-07T15:57:50.000000000+00:00"}
Let's return to Jenkins and configure the cloud
www.aredel.com
Now let's configure the agent, keeping in mind
Requirements:
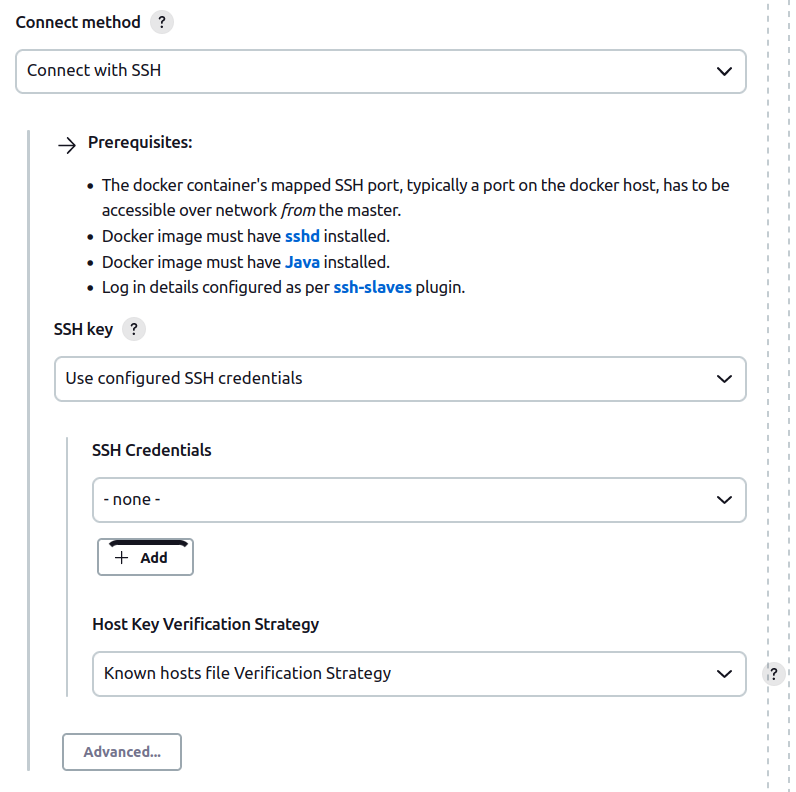
The docker container's mapped SSH port, typically a port on the docker host, has to be accessible over network from the master. Docker image must have sshd installed. Docker image must have Java installed. Log in details configured as per ssh-slaves plugin.
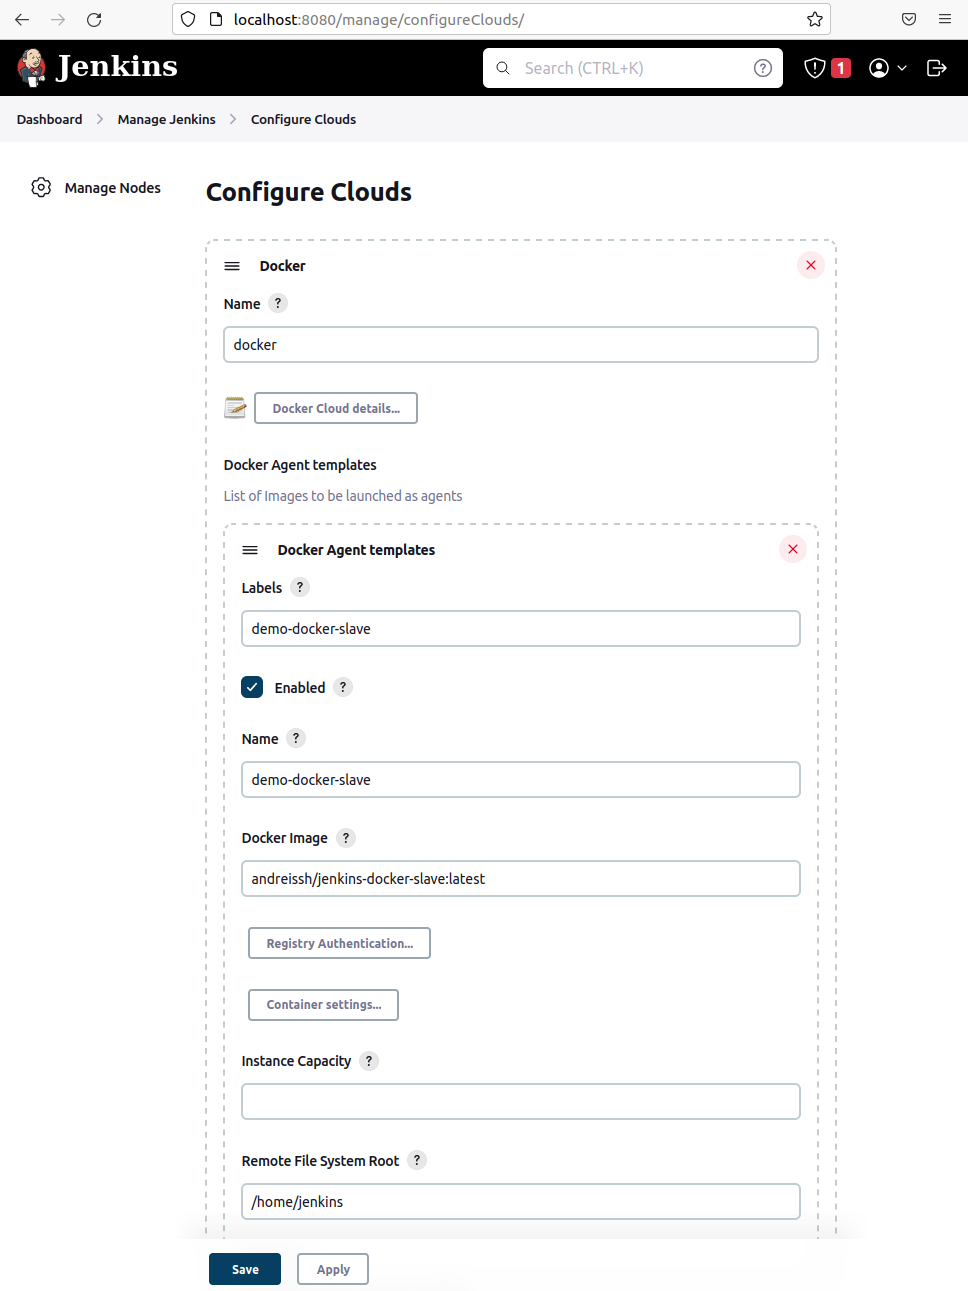
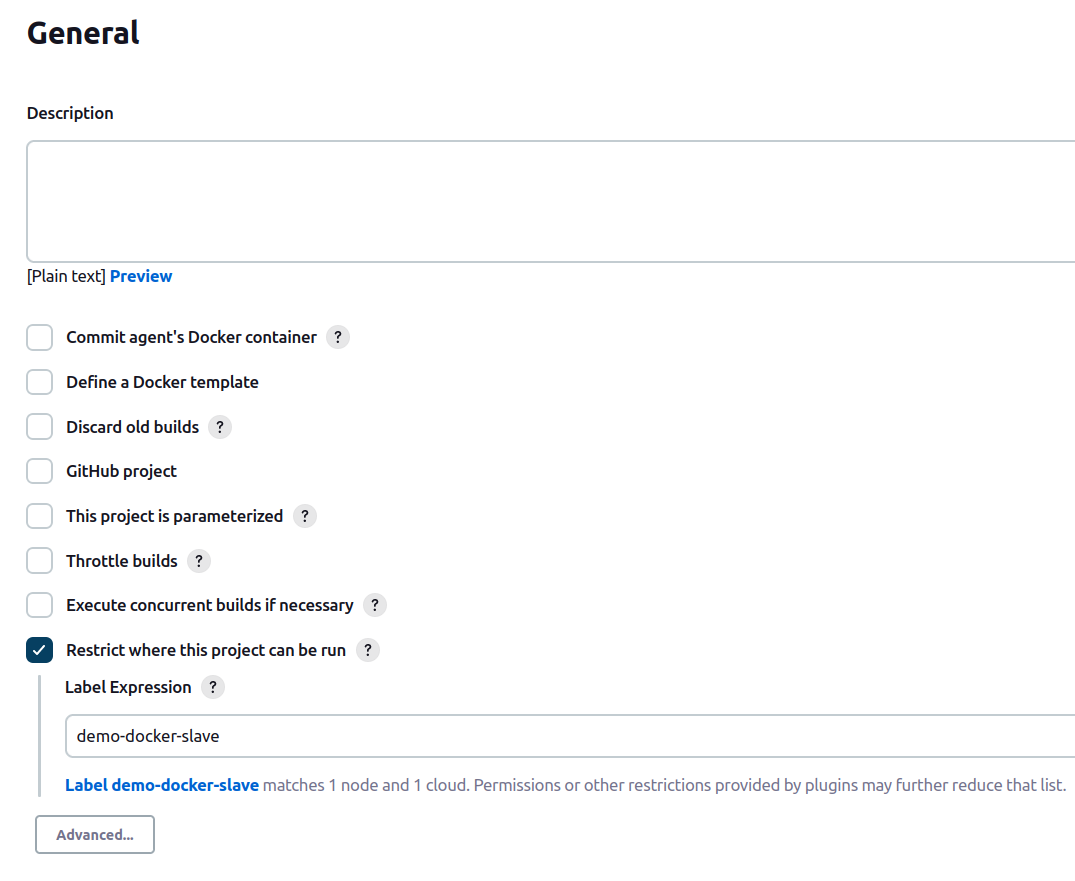
You can make up any name, for example demo-docker-slave
I use my own Docker image. You can study the code
here
.
You can either use the link to my image andreissh/jenkins-docker-slave:latest or
build your own image and push it to your Docker Hub following the
instructions
www.aredel.com
Do not forget to specify Remote File System Root. In this example it is
/home/jenkins
I also recommend setting the Instance Capacity parameter. For example, you can limit it to two. If you do not set this parameter, Jenkins will launch as many agents as it can. If something goes wrong, you will find a list of a large number of inactive agents.
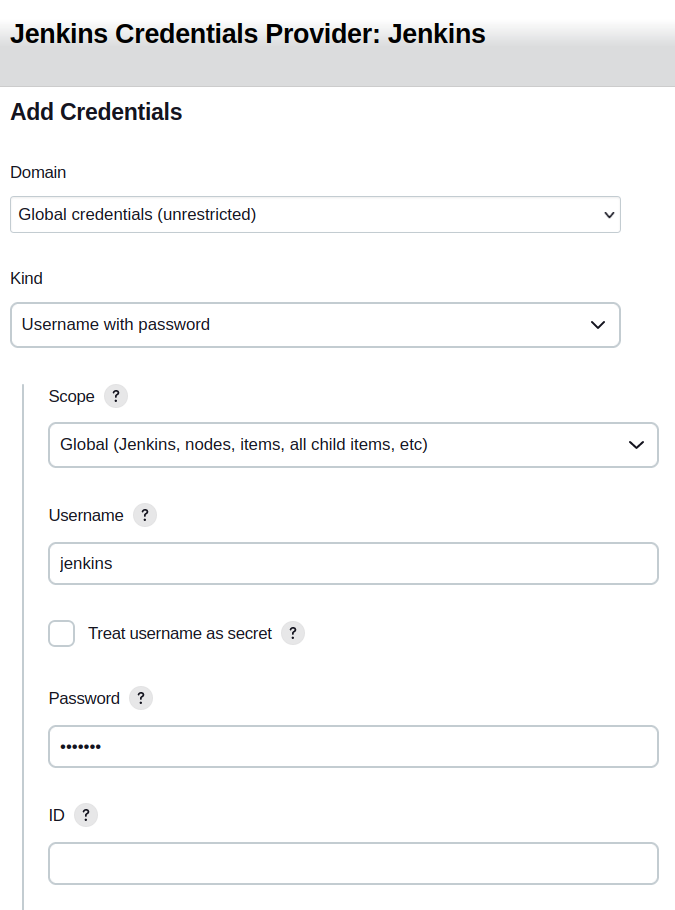
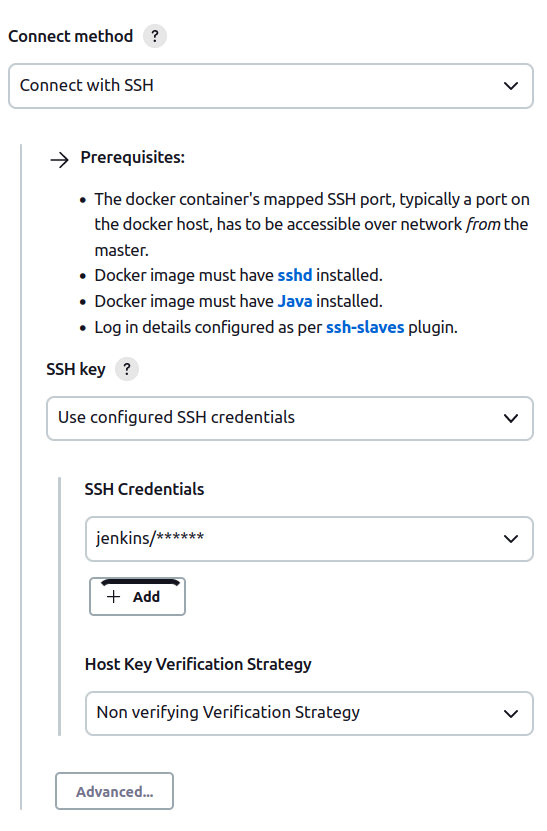
As the Connect Method you can choose SSH and connect with a password.
www.aredel.com
www.aredel.com
www.aredel.com
Now you need to create a job or update an existing one so that it runs on the agent
www.aredel.com
The job itself is elementary: print text with the echo
After successful completion, the logs show that the job ran remotely on the agent demo-docker-slave-xxxxxxxxxxxxx
the agent id is generated at creation.
Started by user andrei Running as SYSTEM Building remotely on demo-docker-slave-000gd8ottq9e0 on docker (demo-docker-slave) in workspace /home/jenkins/workspace/job_for_docker_agent [job_for_docker_agent] $ /bin/sh -xe /tmp/jenkins17605261416739110587.sh + echo Job for docker agent is done! Job for docker agent is done! Finished: SUCCESS
Let's add another template for the docker agent. Now the connection will not be over SSH but via JNLP
Manage Jenkins → Manage nodes and clouds → Configure Clouds → Docker Agent Template → Add Docker Template
We will use the image jenkins/jnlp-slave
The old jenkinsci/jnlp-slave image is outdated and not recommended for use
Requirements:
Jenkins master has to be accessible over network from the container.
Docker image must have Java installed.
Docker image must launch agent.jar by itself or using the EntryPoint Arguments below.
On the Jenkins master
Configure Global Security → Agents → TCP port for inbound agents
You need to set Fixed 50000
Port 50000 was opened in advance in the container with the ports parameter in the
docker-compose.yml
file
Automatic job triggering
Let's look at a job that uses a repository on GitHub
Configure → Source Code Management → Build Triggers
First, let's select Poll SCM
The frequency of repository update checks is set in the style of
cron
H/5 * * * *
Then you need to commit to the repository connected to this job and wait about five minutes.
Started by an SCM change Running as SYSTEM Building remotely on docker_slave_ssh-000i0w2937lrg on docker_ubuntu_esxi2 (docker_slave_ssh) in workspace /home/jenkins/workspace/my_python_job The recommended git tool is: NONE No credentials specified Cloning the remote Git repository Cloning repository https://github.com/yourrepojenkins-docker-slave > git init /home/jenkins/workspace/my_python_job # timeout=10 Fetching upstream changes from https://github.com/yourrepojenkins-docker-slave > git --version # timeout=10 > git --version # 'git version 2.34.1' > git fetch --tags --force --progress -- https://github.com/yourrepojenkins-docker-slave +refs/heads/*:refs/remotes/origin/* # timeout=10 > git config remote.origin.url https://github.com/yourrepojenkins-docker-slave # timeout=10 > git config --add remote.origin.fetch +refs/heads/*:refs/remotes/origin/* # timeout=10 Avoid second fetch > git rev-parse refs/remotes/origin/master^{commit} # timeout=10 Checking out Revision f0943b9194a48bafebf77280e1a848af92c6d6c3 (refs/remotes/origin/master) > git config core.sparsecheckout # timeout=10 > git checkout -f f0943b9194a48bafebf77280e1a848af92c6d6c3 # timeout=10 Commit message: "QA: adds ! to helloworld.py" > git rev-list --no-walk 09810fbbf97a812d396aca02e50c443ce999fa8f # timeout=10 [my_python_job] $ /bin/sh -xe /tmp/jenkins8662150179336980601.sh + python3 helloworld.py Hello World! Finished: SUCCESS
If your job is a Multibranch Pipeline, you can use
Configure → Scan Multibranch Pipeline Triggers → Periodically if not otherwise run → Interval
Where you can set the desired interval.
This feature can work together with webhooks from a remote repository, and is usually
used as a fallback in case a webhook did not fire.
Environment variables
You can study the available environment variables on the page
http://jenkins_url/env-vars.html
For example, in my case it is
http://jenkins.andrei.com:8080/env-vars.html/
Credentials
By installing the Credentials plugin you can centrally store the login, password and other authentication means
right in Jenkins
Credential Scopes:
System - available only on the Jenkins server and nodes. They are not visible to Jenkins jobs
Global - available to everyone.
If you go to a Pipeline, there will also be a Credentials section: there you set Credentials local to
this project and not visible from others. This requires the Folders plugin.

www.aredel.com

www.aredel.com
It is important not to forget to specify the ID, since it is what identifies the data. If you do not set it manually, Jenkins will generate an ID itself and it will be harder to remember.
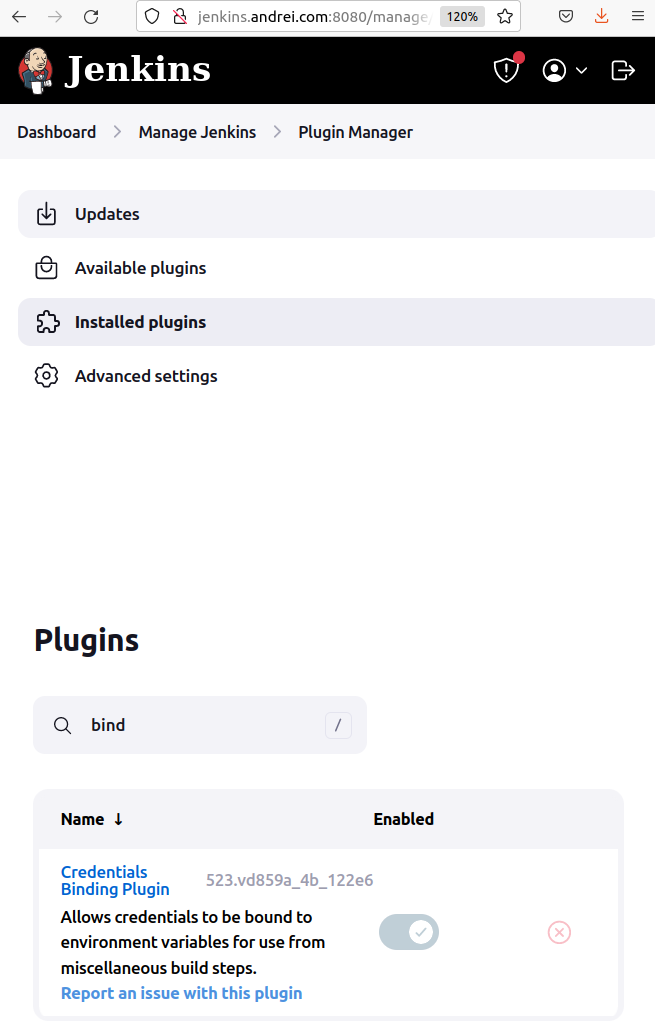
To use the credentials stored in Jenkins, you need to install the plugin Credentials Binding Plugin
www.aredel.com
For how to use credentials in a Pipeline, read the article «Using credentials in Jenkins Pipeline»
Project builders
pipeline { agent any tools { gradle 'Gradle-6.2' } stages { stage("run frontend") { steps { echo 'executing yarn…' nodejs('Node-10.17') { sh 'yarn install' } } } stage("run backend") { steps { echo 'executing gradle…' sh './gradlew -v' } } } }
Article author: Andrei Olegovich